 When I sell one of my titanium handed clocks, I’ve learned the hard way to ship it disassembled. The hands weigh several ounces, and when a shipping box is dropped from 48″ (seems to be the standard handling practice I see when watching them load luggage onto a plane) the heavy hand tears the stem right out of the motor. I’ve tried many very careful methods of shipping it assembled, fool proof. The service sector has been creative in supplying me with improved fools.
So some assembly is required.
First step, unpack everything onto a reasonably clear surface. Preferably a smooth, flat area large enough to rotate the shipping box around.

Take the base, and make sure all the needed parts are removed from its protective cavity. If you opted to get the nut wrench (highly recommended) it will be stored in here with a retaining magnet. Probably the tiny minute hand nut in a bag, as well.
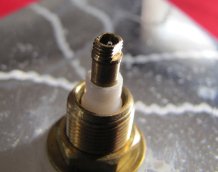
Set the base face up on the table, with the top (12:00 position) away from you. Note the flat sides of the minute hand axle, and make sure they are pointing up to 12:00 for ease of alignment.


On the first hand, the Hour hand, align it with the 12:00 position, slide it over the axle, and simply press it down.
Put pressure on the elevated mounting bracket rather than the hand itself.
Pick up the minute hand nut by placing it on the surface, pressing the top of the wrench to open the bottom, place vertically over the nut, and letting go of the button.

Note the direction of the hole and of the axle. slide the hole over the axle until it drops into place. There should be no pushing; it just drops down when aligned.


Take the nut wrench, vertically, place the nut over the axle, and gently turn until you feel it catch, thread, and then stop. If it doesn’t start, back it off and try to make the wrench more vertical. Gently does it. If you use force, you are probably stripping the threads.
How tight? Enough to turn the minute hand, and then a bit more (block the hand from turning with a finger; don’t grip the hand.

Once the nut is in place, squeeze the release button on the back of the wrench (pressure between palm or thumb and fingers, don’t press down on the clock) and lift it away.
 And on to the third hand, the second hand. Gently place its stem over the axle, feeling for when it is in place. Once it seems to be centered, then gently press it down. There is less clearance for the second hand because it is not likely to collide wa-ay out there like the heavier hands on these not-so-rigid axles.

And the final steps are to put in the battery and hang it on your hook or nail. Handle the clock by the base, and note where the hanger is to help you place it.

Once it is on the wall, set the time by pushing the minute hand around from outside the radius of the hour hand with a finger or pen or some such. Take care not to lift or depress the hand, nor to bump the hour hand.
Instructions on how to tell time precisely to 5 minutes are on the MrTitanium.com Clock Page. With practice, you can accurately interpolate to the minute.


 Posted by Dan Klarmann